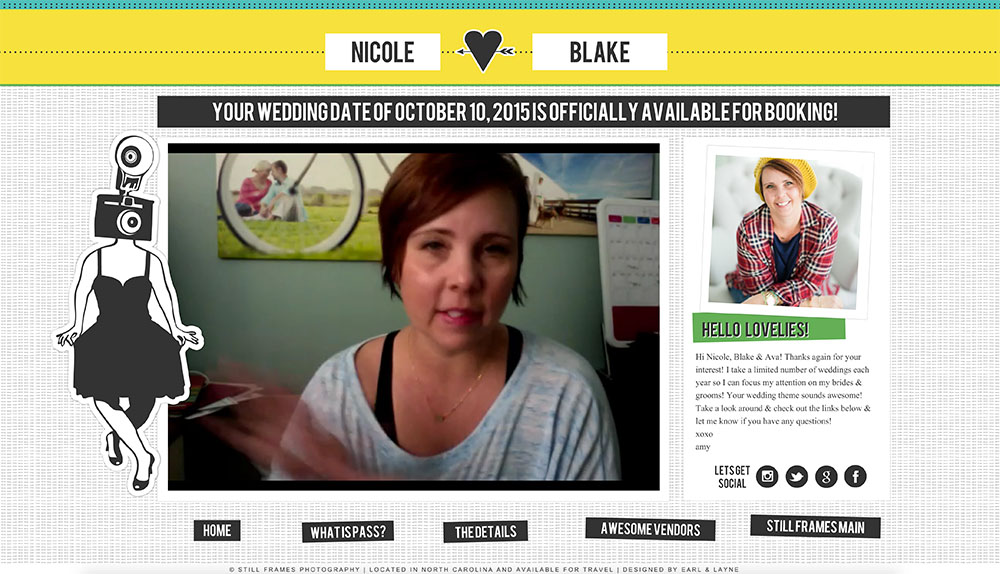
I love the idea of a custom site for your clients where they can showcase their images in a big beautiful gallery, and have information that is easily at their disposal. Making your clients feel loved and special can be an important aspect of your business and brand. Creating clients sites for each client, however, can be time-consuming and you may not think it is worth doing, especially when you are busy.
How can you make client plus sites a less daunting task for yourself, yet still appear like you have created something custom and unique for your clients? I suggest including information that you can use for multiple clients, without having to change for each specific one.
[dropcap]1[/dropcap]Keep your design the same for each client. Having a template that you replicate from client to client is an excellent way to keep your brand consistent and also reduce the amount of time spent on each client plus site. You can export a general design that you create, and then use it for each client, making sure to
[dropcap]2[/dropcap]Anything that is relevant to your clients or their families right before or right after the wedding that is the same information for all clients can be great to include on a client plus site. Items such as products you offer (albums, canvases, prints, boxes, etc.) can all be put on a page, and that information does not need to change from one client's plus site to another, saving you time, but still delivering your client pertinent information and allowing you to upsell items after the session.

You can even combine a custom plus site with your client lounge, making the homepage a gallery of favorite images from their engagement and wedding sessions, and the interior pages information that they can use along the way, but that isn't necessarily going to change from client to client, such as a frequently asked questions section. Ideally, you want to be able to update only a page or two for each client in order to cut down on time.
Some other ideas for information to include would be information about how to access a gallery (PASS or Pixieset for example), or vendors that you love and would recommend to them, etc.
If you are a portrait photographer, this tactic can work well for you as well, as your clients will view their site post-session, and then view all of the lovely offerings that they can purchase from your studio on the same site as their images. In this way, the plus site can be a great tool to upsell your products.
[pullquote]Don't forget a mobile version of your client lounge. In the mobile age, this is a necessity, and also why I recommend not having to change more than a few gallery images on your web and mobile versions to maximize effect, but minimize time. [/pullquote]
[dropcap]3[/dropcap]Utilize style group elements to make sure that the site is custom all around. I would obviously suggest including your client's name and wedding date (or family name), but having those items within a style group means you only have to change them once, vs. multiple times on every single page. To add an item to a style group, make sure that the layer with the information is dragged into the foreground or background layer within your “Layers” panel.
I have clients who even utilize one-page client sites, which is easy to create, easy to swap out and still has the impact that a custom client site can have on your clients. Hopefully by using these tips, you can still include custom items for your clients, while still providing them something custom.
Rachael Earl is the owner and lead website designer at Earl & Layne, and is a Showit Design Partner. She has been using Showit to design websites and online identities for creative professionals since 2009, and is also a professional photographer. Rachael has been married to her amazing husband since 2000, and they have 4 incredibly adorable offspring together. They call Gilbert, Arizona their home, which is affectionately and alternatively known as "the surface of the sun."
