Load Newsreader Bold Font
One of the most common questions we get from photographers is about how we get our image quality to look so good on our blog, and especially on Facebook, the site notorious for taking a beautiful photograph and reducing the quality to the stuff of photographers' nightmares. It's a challenge to take huge high-resolution files, compress them down to a shareable size, and still maintain the integrity and quality of the original photograph.
Today, we're going to break down how we prepare our images for the web, and hopefully make the web-optimizing process a little less daunting for anyone who wants to simplify their blogging workflow.
For any image we want to post on the web, we use the greatest little software that ever lived called BlogStomp. We're pretty convinced that it might just be the best $49 we've ever spent in our business (besides the ExpoDisc!). Before BlogStomp, we used to prep our images in Photoshop! WAH WAH WAHHHHH (insert the sound of the Debbie Downer horns here). As with anything in Photoshop, it sucked precious minutes away from our life every time we needed to pair two vertical images together, and getting a watermark on Facebook images was a whole different battle. To top it all off, when we tried to compress the file size to make it acceptable for the web, the color went from terrific to terrible faster than you can say “I quit!” and it left our work looking gray and flat.
Enter BlogStomp. A software that allows you to drag and drop your full-resolution images, then pair, customize, re-order, re-size and save them specifically for your blog or Facebook requirements with the click of a mouse. There are no “actions,” no templates, no wait time. Just easy, fast results.
Here's how we use BlogStomp to optimize our images for web:
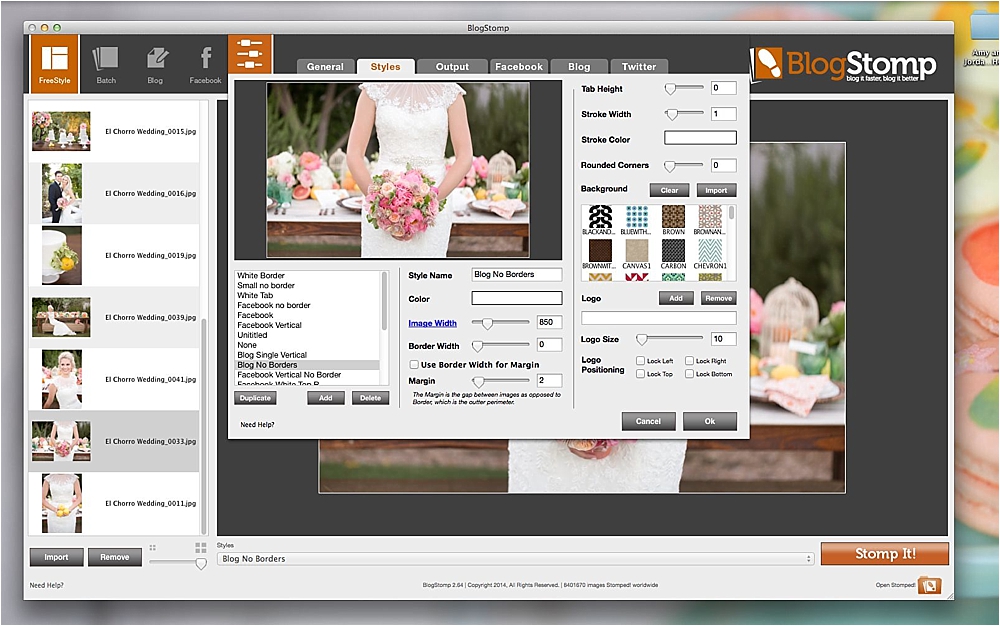
1. The first time you use BlogStomp, you'll want to make sure the images will be sized and styled correctly for your purposes (we share our settings at the bottom of these instructions), so click the “Settings” button on the top left side (closest to the center) and then click the “Styles” tab.
2. Inside the “Styles” tab you can create and save as many “styles” as you want by giving each one a unique name. We name ours based on where it's going and what it'll look like, like “Facebook (no border)” or “Blog (no border).” From there you can select the image & border width, make decisions about the margins and also use the “Logo” tool to import your watermark or logo for either some or all of your stomped styles, which you can choose to apply directly onto your images, or onto a frame/border around your images. As you can see from this screenshot, we have a lot of styles saved, so that we can work quickly and efficiently while we're stomping, no matter what we're prepping the images for.
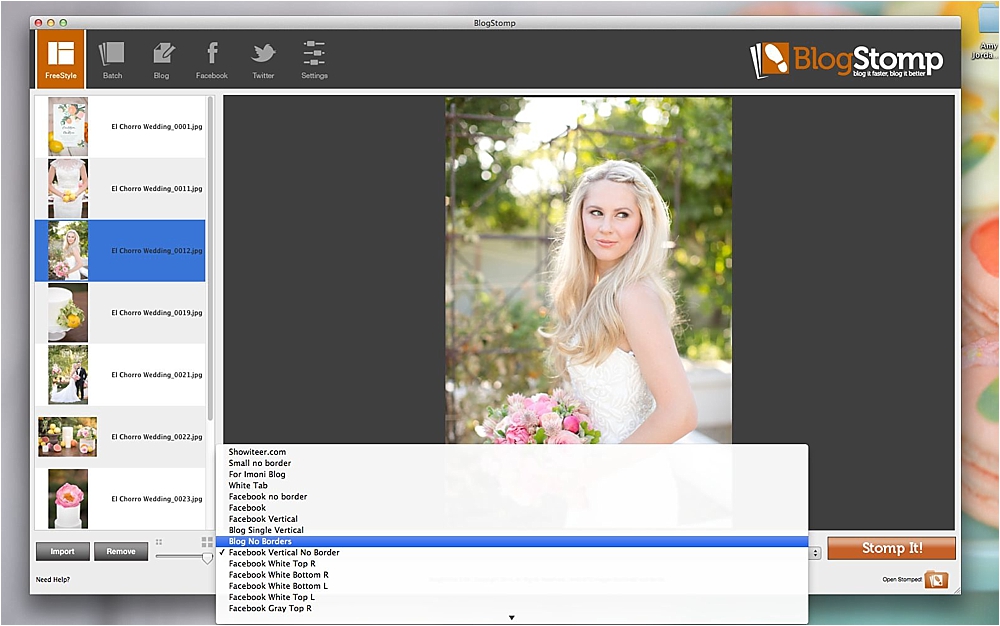
3. Once your styles are set, you can return to the “Freestyle” tab (which is where we spend most of our time in BlogStomp) and use the drop down menu, which will now have all of the custom styles you created in the “Settings/Style” tab saved. Whichever style is selected in the drop down menu is the one BlogStomp will apply to every image you stomp with just one click until you change your selection in the drop down menu.
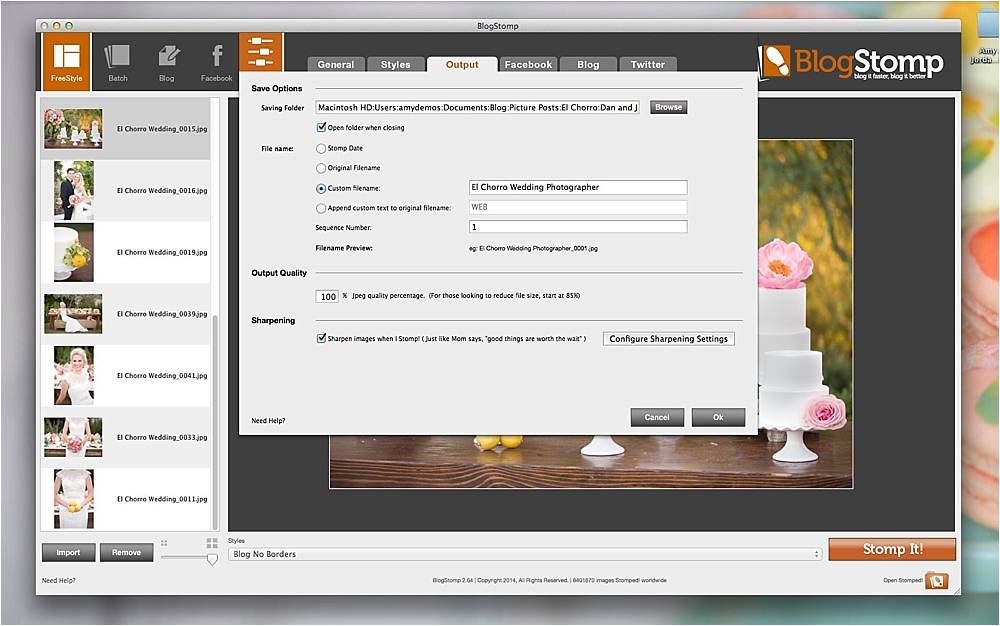
4. The last thing you need to do before you start stomping your entire batch of images is tell BlogStomp where to store your newly stomped images and what to name the new files. This can be done in the “Settings” tab as well, under the “Output” section. This is also where you can choose whether or not you want to sharpen your images. Since we believe images lose some of their original photo quality as they're being compressed for web, we set our sharpening to 33% inside of BlogStomp.
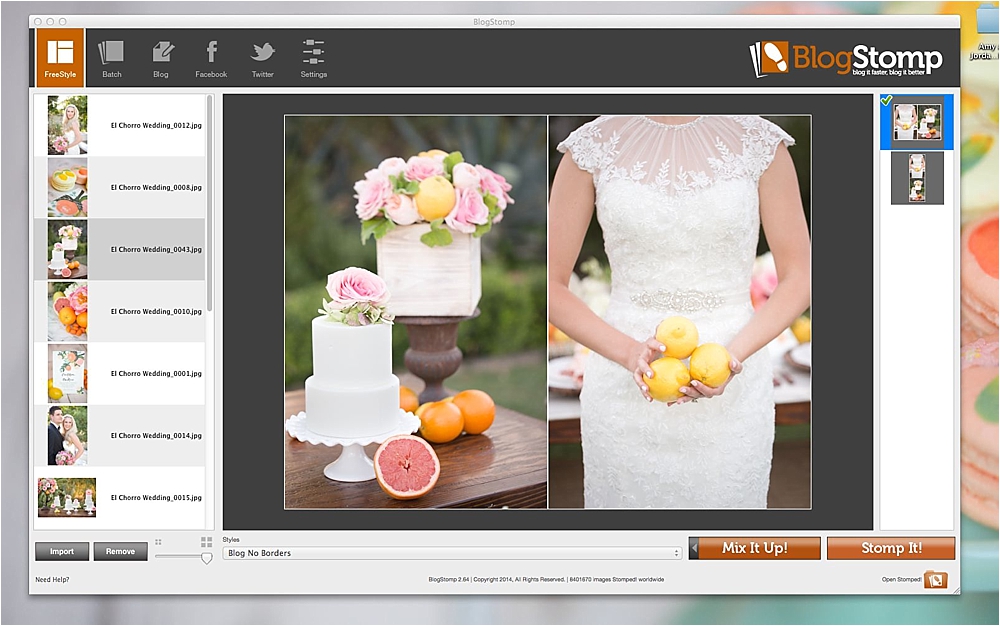
5. Return to the “FreeStyle” menu, select which style you want all of your images to be set to in the drop down menu, and let the stomping begin! You can stomp individual images, or you can pair them together with another image, or even create a grouping of images. For our purposes, we usually stick to either single images or two vertical images paired up. We even order them ahead of time when we're still in our Lightroom catalog, so when we import them here, they're already in the order we want them, and we can click the “Stomp It!” button faster than we can blink. To pair two images, all you have to do is select both images, then click “Stomp It.” If you don't order them in advance like we do, you can simply click the “Mix It Up,” button, and it will switch the arrangement of the photos.
For Facebook:
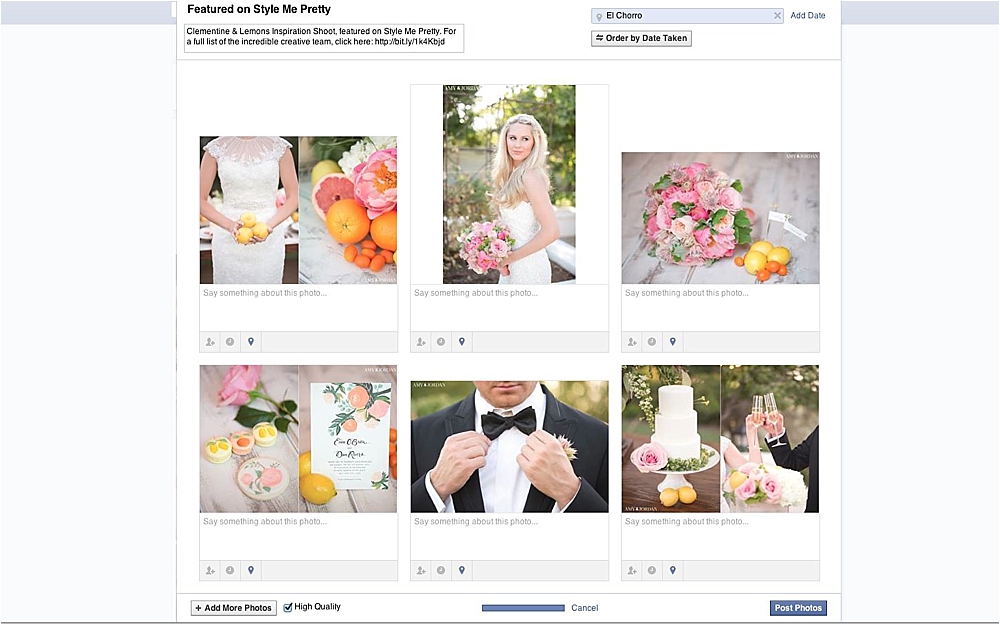
To optimize our images for Facebook, we have special “styles” saved in BlogStomp that match Facebook's recommend pixels and include our watermark. We stomp our images for Facebook at 2048 pixels wide. We also make sure when we're uploading to Facebook that the tiny box next to the words “High Quality” in the bottom left corner is checked.
So that's it! That's how we optimize our photos for web! If you found this post helpful, we'd love for you to sign up for The Monday Minute, a completely FREE resource we've created for photographers. Once a week, you'll receive a new email full of tips and tricks you can't find on our blog delivered straight to your inbox designed to help your grow in every area of your business. We hope this can be a blessing to you!
