Load Newsreader Bold Font
Most speedlights have power ranging from full (1/1) to 1/128th. When starting at full power, each time we lower the power by one stop we are cutting the flash power in half. This means that a flash set to 1/2 power is half of the amount of light the flash would produce at full power. If we then continued to drop the power to 1/4 we are cutting the power in half again. This process continues all the way to 1/128th power.
I told you that was easy! It was so easy I think it's now time to get back to critical thinking and talk about the Inverse Square Law. Yay for math!
INVERSE SQUARE LAW
The inverse square law (aka flash to subject distance) is usually the hardest part for people to grasp. But it's really not that hard if you stop and think about it for a minute. The inverse square law states that every time the light doubles in distance, you lose 75% of light. Confused? Let's try to explain it in a way that's easier to understand.
Think of it in terms of a light bulb. The closer you stand to the light bulb the more intense the light is. As you back away, the intensity decreases. Simple, right? Well…we're not done yet so buckle up for a bit more. As you move away from the light bulb, not only will the light decrease in intensity, the falloff in intensity becomes much more gradual.
The same holds true with flash. The further the light travels from the flash, the more gradual the light falloff. If your flash is positioned in the air and angled down at your subjects face from a distance of 6”, the falloff in light is going to be very sudden. If the image is properly exposed for the eyes, by the time the light travels to the feet (6 ft. away) you will be losing 3.5 stops of light. This means the light on your subjects feet will be much darker than the face, adding more dramatic lighting to the shot. However, if you place your light at the same height but move it back 4 feet and expose properly, suddenly the light becomes very even on your subject. The head and the feet will be between one stop of light from each other.
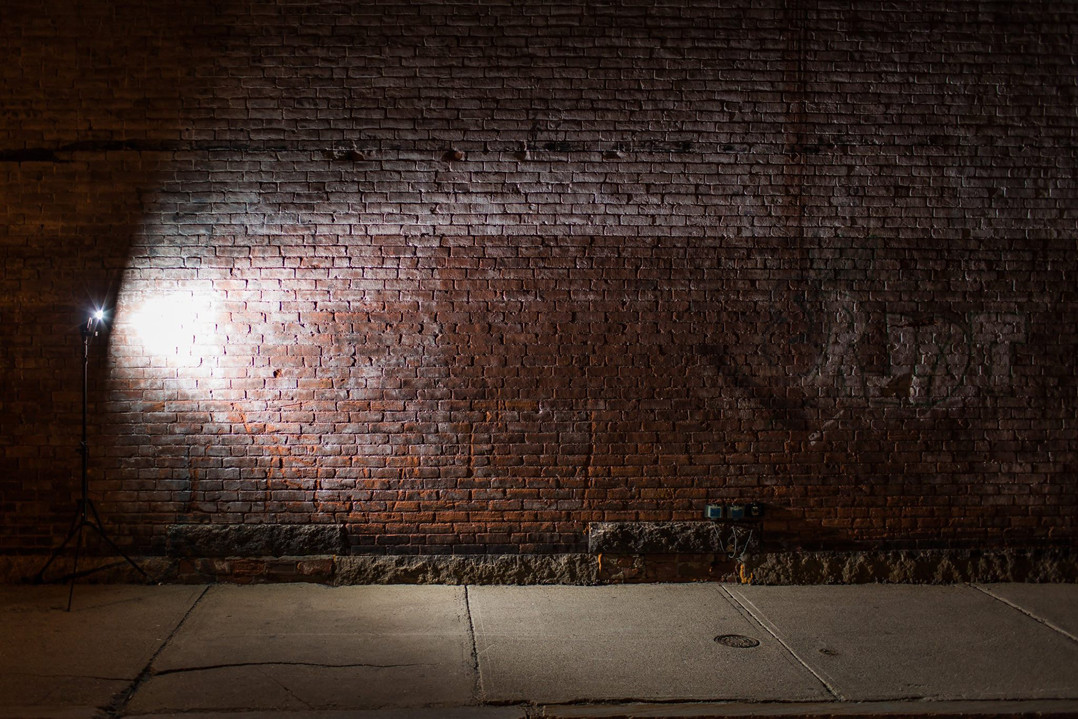
The example below is a good example of the intensity of light as it leaves the flash and the falloff that occurs as the light travels.
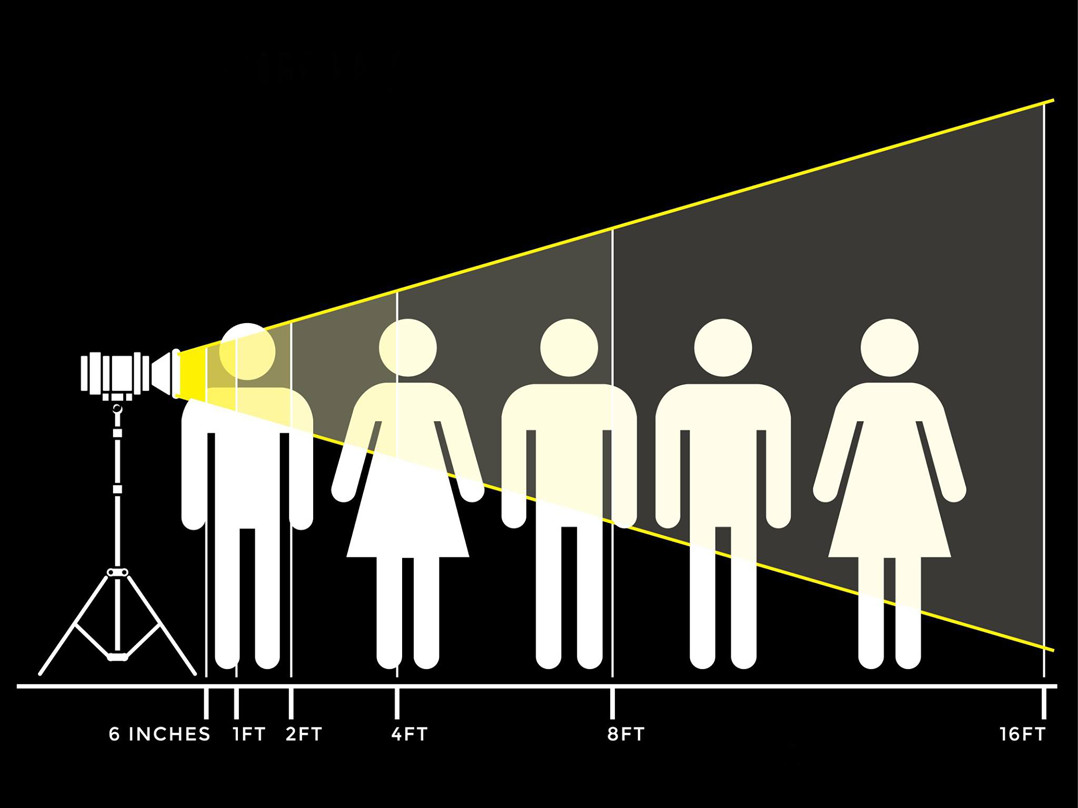
To get a better understanding of what is actually happening, let's take a look at the graphic below.
By looking at the graphic above, you can see betweeen 3 and 6 inches we lose one stop of light. Then, as the distance doubles from 6 inchees to 1 foot we lose another stop of light. This process of losing a stop of light repeats itself each time the flash to subject distance doubles. When your subject is close to the light source the fall- off is sudden. But as we begin to move further from the light source the distance between each stop of light becomes more gradual. At 8-16 ft. there is significatly more distance between stops than there would be 6 inches from the light source.
So what does this mean for you? Well, if you want your subject to have more dramatic light, move them closer to the flash. If you'd like nice even lighting from head to toe you'll want your subject farther from the flash.
See…that wasn't too hard, right?
ISO – CONTROLS SENSITIVITY TO ALL LIGHT
ISO changes sensitivity to ALL light in flash photography. By increasing or decreasing your ISO the entire image will be affected.
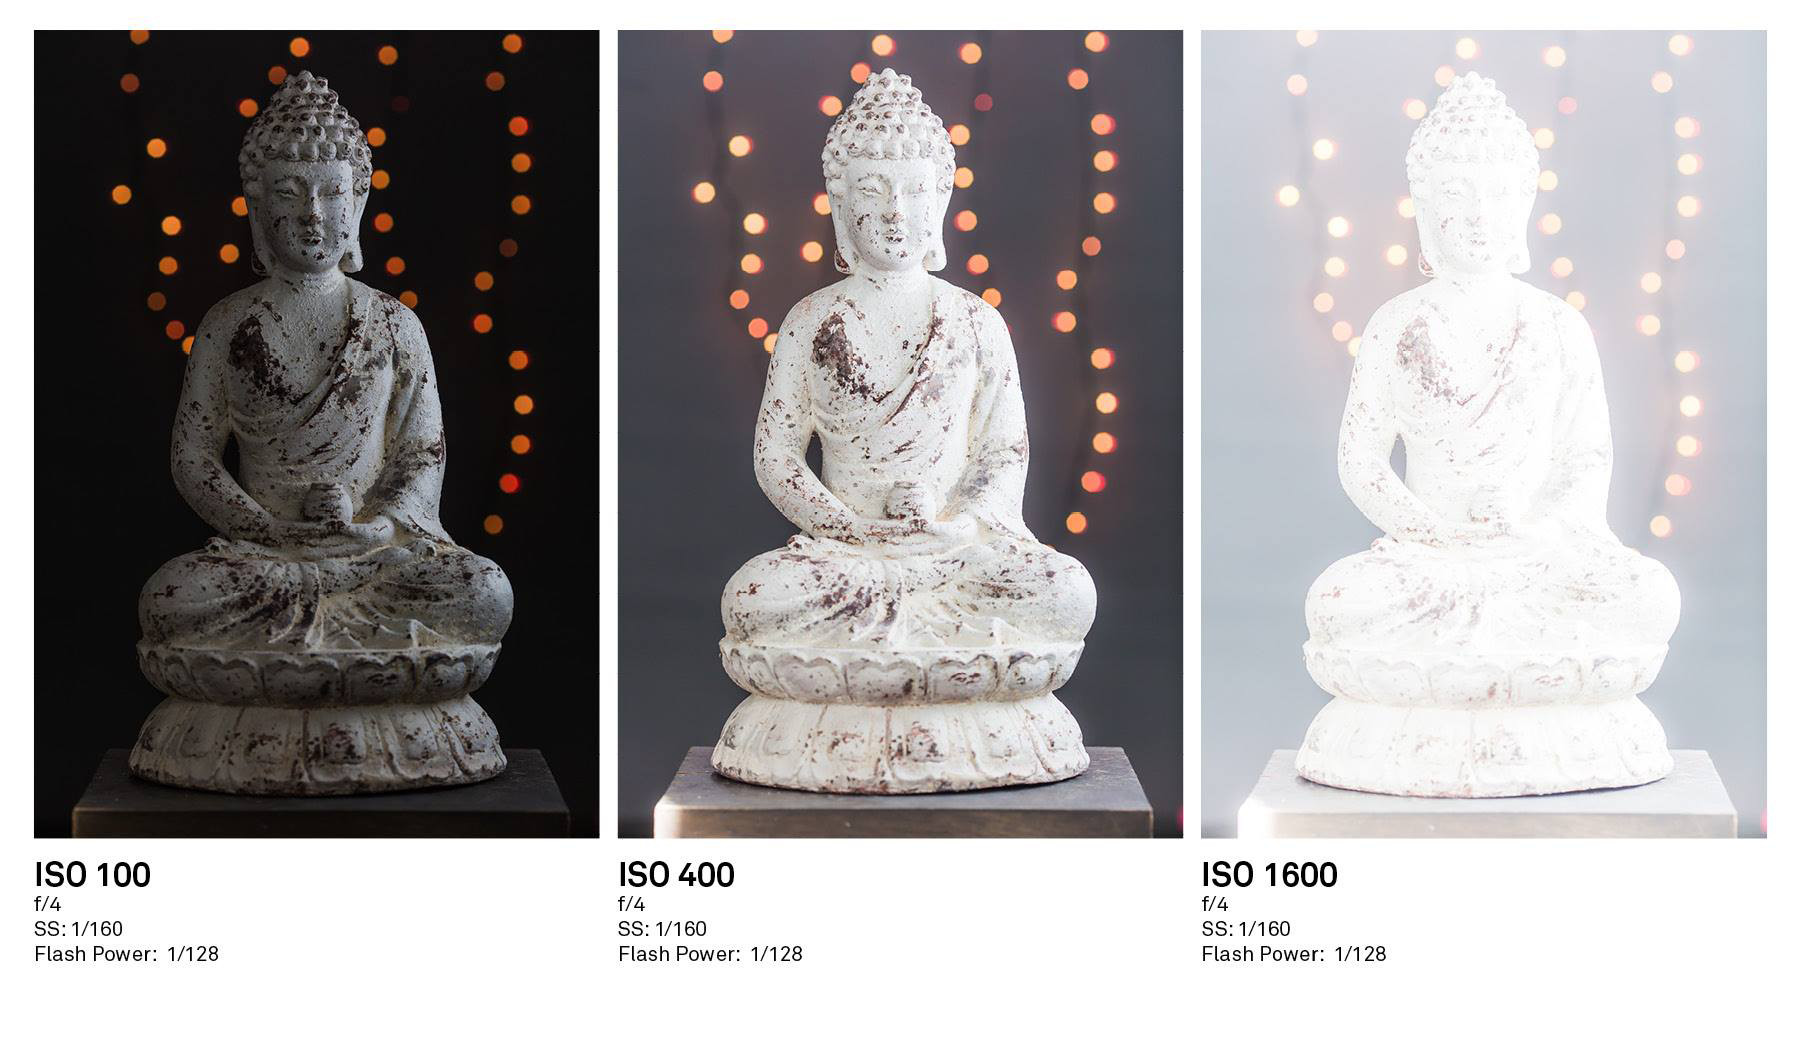
In the example below it is easy to see how ISO effects the image. At ISO 100 our exposure is spot on. But as we raise to ISO 400 we can see the entire image is effected. Not only does the flash exposure begin to blowout the subject, the backdrop and twinkling lights in the background become brighter too. As we move to 1600 ISO the image becomes unusable. We've lost all information in the highlights and the entire image is blown out.
When thinking about what ISO you should be shooting at it's important to take into account things like flash recycle times and flash battery life. If you're shooting at a low ISO with your flash set to full power it is going to take a long time for your flash to recycle between images and your batteries probably won't last very long. By increasing your ISO, you're then able to lower your flash power to compensate. But remember before we said our aperture controls flash exposure. By increasing ISO by 1 stop our aperture will have to increase by one stop as well to keep correct exposure, and vice versa. If, instead, you want your aperture to stay the same as you increase your ISO, your flash to subject distance will have to increase by one stop. So if your flash is 1 foot from your subject, that distance will increase to 2 ft. to compensate for the increase in ISO.
As a general rule of thumb I like to keep my flash power set to 1/4 power or lower. This helps my batteries last longer and also keeps my recycle time quick so I can keep shooting. If I'm shooting a wedding reception I try to keep my flash power even lower, usually 1/16th or lower. Even that small adjustment helps to keep my recycle times quick enough so that I don't miss anything.
And there we have it! Now that you've read through this crash course to getting started with OCF it's time to put everything to practice. As you begin to experiment taking Off Camera Flash photos, start slow. Work through each variable individually so you experience the changes first hand. Look closely at how changing a single variable effects the image. Once you're comfortable with one variable, move on to the next. Give yourself ample practice time get a firm grasp on the subject material in this book.
There's nothing worse than jumping in head first without understanding something and failing. So take the time to truly understand what you're learning. It's common to hear people say they've tried using Off Camera Flash in the past and gave up because it just wasn't working. Don't be like them! If something is not looking right, take a deep breath and look closely at your image. Look back and reference this blog to find which areas you're struggling with and what you can do to get things right.
I promise this stuff isn't rocket science. It's pretty simple once you put in the practice. The more you practice the content in this blog the quicker you will become comfortable with Off Camera Flash photography and the sooner you'll be able to walk into any situation with confidence in your abilities to take control of the light and wow your clients. Like most things in life, if you don't take the time to practice you're going to set yourself up for failure.
I hope you've enjoyed learning about the basics of Off Camera Flash. As always, if you have any questions feel free to get in touch with me here or through my website jamieivins.com
Keep shredding Showiteers!
Jamie is a wedding photographer based outside Boston. He specializes in having fun and is on a constant quest to find the worlds best breakfast burrito. When Jamie isn't working or eating burritos he can usually be found with his two kids and his wife, trying to quench the thirst for adventure. Or fishing. He REALLY loves fishing.


